
WordPress is broadly famous because of its hassle-free consumer experience, but website, wordpress plugin, or theme developers have different needs to that particular of the finish user. Many often hear the recommendation to “never focus on an active site”, and establishing a WordPress development atmosphere is really a key consideration you need to make to keep the WordPress police out of your door.

In the following paragraphs, we’ll explore exactly what a WordPress development atmosphere is, why it’s vital for the workflow, and the way to set yours in five steps. Let’s get cracking!
What a WordPress Development Environment Is (And Why You Need One)
 |
| Image Source Elegantthemes |
The bottom line is, a Wordpress Development atmosphere is an accumulation of tools that permit you to securely test out your projects before they're going live. However, your alternatives is determined by your specific needs (as well as your tastes!).
It’s more often than not smart to check out any major features inside a testing atmosphere before deploying them, for an additional reasons:
- It enables you to test your changes locally and spot any problems, without any risk.
- You can configure your testing environment to your liking. This will enable you to test if any themes or plugins you created show compatibility errors, for example.
- Relying on a local testing environment is usually faster (and cheaper!) than connecting to a remote server.
- It enables you to work on your projects even when you don’t have access to the internet.
- Depending on which tools you use, deploying a local WordPress site might only take minutes.
Knowing that, let’s walk-through the entire process of establishing a full-featured WordPress development atmosphere.
How to Set Up Your WordPress Development Environment (In 5 Steps)
Once we alluded to earlier, there isn’t any one-size-fits-all solution with regards to development environments - not really for WordPress.
When time you’re finished navigating these steps, you’ll have setup your personal WordPress development atmosphere. On the way, we’ll offer our thoughts on the best tools for your requirements. However, we begin and among the toughest choices - selecting a server solution.
1. Choose a Suitable Server Solution
To begin with, you’re have to a passionate server, and you will find two choices available - virtual or local:
A virtual server. This requires developing a compartmentalized ‘computer inside a computer’. Both software you’ll need and WordPress are set up within, and also you configure it to be able to can get on from the browser.
A local server. This requires establishing both server software and WordPress directly on your pc, while you would with every other software.
Overall, local servers are simpler to set up and access, but you will find downsides. For example, setup could be complicated with no guide. In addition to this, your selected solution might not be WordPress-specific. Uninstalling them is yet another hassle unless of course you utilize a complete stack. Solutions for example XAMPP, MAMP or WampServer frequently bundle together all you need into one package:
 |
| Image Source Elegantthemes.com |
Virtual servers may also be complicated to setup if you are unfamiliar with them. However, as opposed to local servers, you’re in a position to create as numerous virtual systems as the computer’s sources permit without encountering compatibility issues. In addition, once you’re completed with a specific installation, you are able to delete its virtual system cleanly. Take Vagrant, for instance:
 |
| Image Source Elegantthemes.com |
This can be a tool that allows you to create portable development environments (and WordPress websites) with the command line. Two primary advantages are its lightweight environments and wide library of user configurations. Probably the most popular selections for WordPress users include Varying Vagrant Vagrants (VVV) and VIP Quickstart.
Finally, there’s a kind of new, middle ground between your local and virtual approaches. A couple of the most popular tools within this category are DesktopServer and Local by Flywheel. Both enable you to create an limitless quantity of WordPress websites, personalize the selection of server, and delete your sites cleanly when you are done. Used, this method gives you all the advantages of virtualization combined with individuals of local setups, and it is the choice we advise.
2. Find a Suitable Text Editor or IDE
After you have your server setup, you’ll require a good text editor. Experienced developers frequently get their favorites - they already know that that the good, simple to use development-oriented text editor increases your efficiency.
 |
| Image Source Elegantthemes.com |
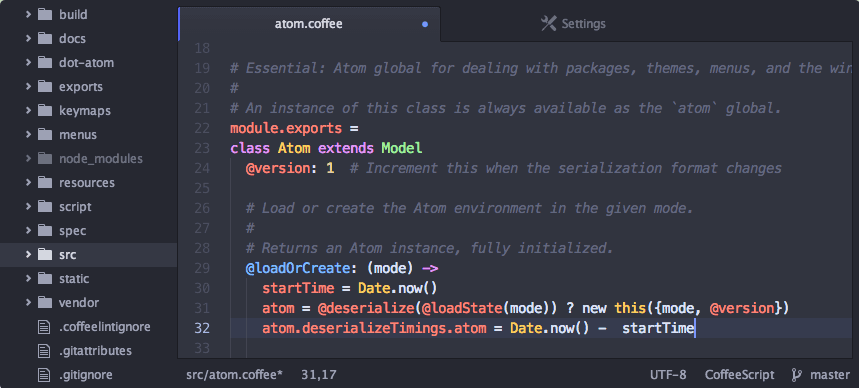
Atom is a good open-source text editor suited to development.
There are many text editors available, and discussions regarding their various merits are usually heated. Within our situation, we’re big on Atom because of its number of packages (or extensions) and auto-completion system. If you opt to follow within our actions, here’s a great summary of the tool.
As far as IDEs go, NetBeans is one of the best choices for WordPress development:
 |
| Image Source elegantthemes.com |
Just like text editors, there’s lots of competition. If you are thinking about an IDE, it’s important to look into the other available options without having to be swayed by each solution’s group of followers - make certain you try out each one of these if at all possible before plumping for any solution.
3. Pick a Suitable Browser
Most contemporary browsers ship using their own group of developer tools, causing them to be well suited for focusing on WordPress websites. For instance, go ahead and take Chrome DevTools. They allow you to debug sites and test them out for responsiveness, all without departing your browser:
 |
| Image Source elegantthemes.com |
Each browser’s group of developer tools will vary, however a couple of share some significant functionality,such as Chrome and Firefox. The second even supplies a browser tailor-made for your requirements, known as Firefox Developer Edition:
 |
| Image Source elegantthemes.com |
However, it’s important to note individuals aren’t the only real browsers which include development-related features. Safari also has its own set of development tools, as does Edge and Opera.
4. Enable Debugging for Your WordPress Installation
At this time, you ought to have a functional server setup, a text editor or perhaps an IDE, and some browser developer tools. Should you haven’t installed WordPress in your atmosphere (or generate a new site if you are utilizing a tool for example Local by Flywheel) achieve this now. We have to enable WordPress’ debugging function, which is a vital step.
This selection enables WordPress to show a summary of any generated errors. It's really a lifesaver during development since it’ll allow you to catch any errors that arise while you tinker together with your project. Based on your configuration, it can save you these problems on the log, or display them in your first page.
Instead of provide you with step-by-step instructions, let's show you perfectly into a previous piece dedicated to the topic - it has all you need to learn about enabling and configuring debugging in WordPress.
5. Install Any Optional WordPress Development Tools
Right now, you ought to have a complete group of WordPress development tools, and a method to catch bugs. That needs to be all you need to get cracking, but there’s always room for additional based on your individual needs.
For Example, using the WordPress Command Line (WP-CLI) tool can help you streamline your development process, and it is instructions are simple to commit to memory. There's also lots of tools which will make your existence simpler (bundled within a handy plugin called Developer), such as Query Monitor. This allows you to debug your database queries, hooks, conditionals, and HTTP demands:
 |
| Image Source elegantthemes.com |
 |
| Image Source elegantthemes.com |
Finally, opt for importing WordPress’ official Theme Unit Test data kit if you are testing on the bare site. This file will instantly populate your website using the elements a genuine you might include, for example posts, pages, and comments, and a number of unique formatting.
Importing this data will allow you to utilize real-world content, and allow you to place any mistakes before pushing your website live, and without having to spend time populating it with your personal content.
What to Do Once You’ve Set Up Your WordPress Development Environment
Now you must an entire WordPress development atmosphere, you have to learn to utilize it. Frequently, it's important to implement additional features, plugins, or styles for your live website. Since it’s bad practice to create live changes, the best choice would be to clone your website utilizing a wordpress plugin for example Duplicator:
 |
| Image Source elegantthemes.com |
Using this plugin, you can create a carbon copy
This method is generally referred to as ‘staging’, and it is answer to a secure web design workflow. However, some web hosting companies for example WP Engine, Flywheel, and SiteGround offer advanced staging options inside their plans, and we’d recommend plumping with this option if it is available.
Conclusion
We won’t lie - establishing a WordPress development atmosphere 's time-consuming. However, this small investment should repay in a major way while you keep using it. The best atmosphere won't improve your productivity, it’ll allow you to iron out any bugs inside your project on the way.
Within this piece, we’ve walked you thru five steps to produce your personal WordPress development atmosphere. Let’s rapidly recap them:
- Choose a suitable server solution.
- Find a good text editor or IDE.
- Pick a suitable browser.
- Enable debugging for your WordPress installation.
- Install any optional WordPress tools you need.
What tools can’t you reside without inside your WordPress development atmosphere? Subscribe and inform us why within the comments section below!


7 Comments
SEO Internship in Bangalore
SMO Internship in Bangalore
Bangalore Internship Trainning
Best web hosting in Singapore
Singapore #1 service provider for business email and cloud
Best managed cloud server in Singapore
Best business web hosting in Singapore
Best email hosting in Singapore
Salesforce training in Bangalore
SMO Internship in Bangalore
SEO Internship in Bangalore
Digital Marketing Internship Program in Bangalore
Wordpress Development
Web development
Biharapps is the best website design agency and mobile app development company in Dubai, UAE. Top andoid app developers and iOS app developers , web designers in Dubai, UAE and Software development company in Dubai, UAE. We are Digital Marketing Agency and SEO Company in UAE.
Dokan driver apps
Dokan developer
woocommerce developer